Cruffins are one of my favorite pastries to make on a slow weekend morning, which is why I kept coming back to the idea of a gluten free cruffins recipe until I finally got it right. They have all the flaky, swirled layers you love about a croissant and the soft, pull-apart texture of a muffin, but with a gluten free dough that actually holds together beautifully. Rolled in cinnamon sugar straight from the oven, they smell exactly like a proper bakery. These are the kind of gluten free pastries that make people do a double take when you tell them what they are made from.
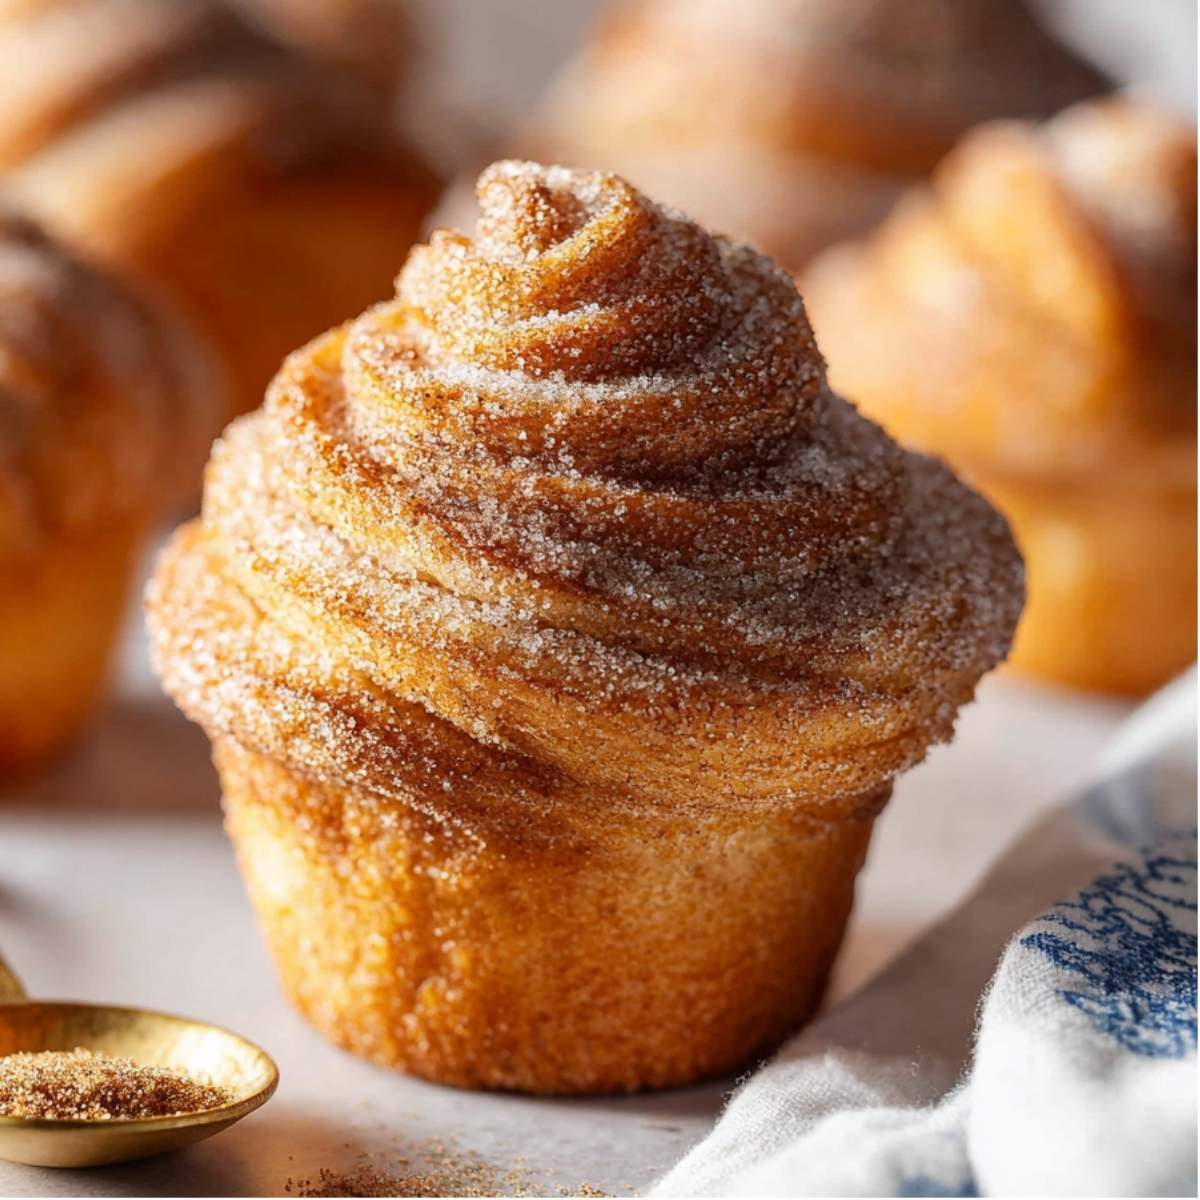
There is a small bakery near my parents' house that makes the most incredible cruffins. I used to stop there every Saturday morning with Emma until I realized she could not eat them anymore after we discovered her gluten sensitivity. That was the moment I decided to figure this out myself. If you love easy baking projects that are worth every minute, my cinnamon rolls from scratch are another recipe that uses that same cozy cinnamon sugar magic our family keeps coming back to.
Jump to:
Why You'll Love These Gluten Free Cruffins
- These are a delicious pastry hybrid that looks and tastes like it came from a specialty bakery, but you can make them completely at home with simple ingredients.
- The gluten free enriched dough is soft, layered, and tender, nothing like the dry crumbly texture you might expect from gluten free baking.
- No deep-frying required. These bake right in a standard muffin tin, making cleanup easy and the result completely repeatable.
- They are naturally adaptable. You can roll them in classic cinnamon sugar, drizzle with honey, or dust with powdered sugar depending on your mood.
- The recipe is designed for home bakers, not professionals. No laminating station, no special equipment, just a bowl, a rolling pin, and a muffin tin.
Ingredients for Gluten Free Cruffins
Here is everything you need to make these gluten free cruffins at home. Most of it is pantry staple territory with a few key players that do the heavy lifting.
What You'll Need
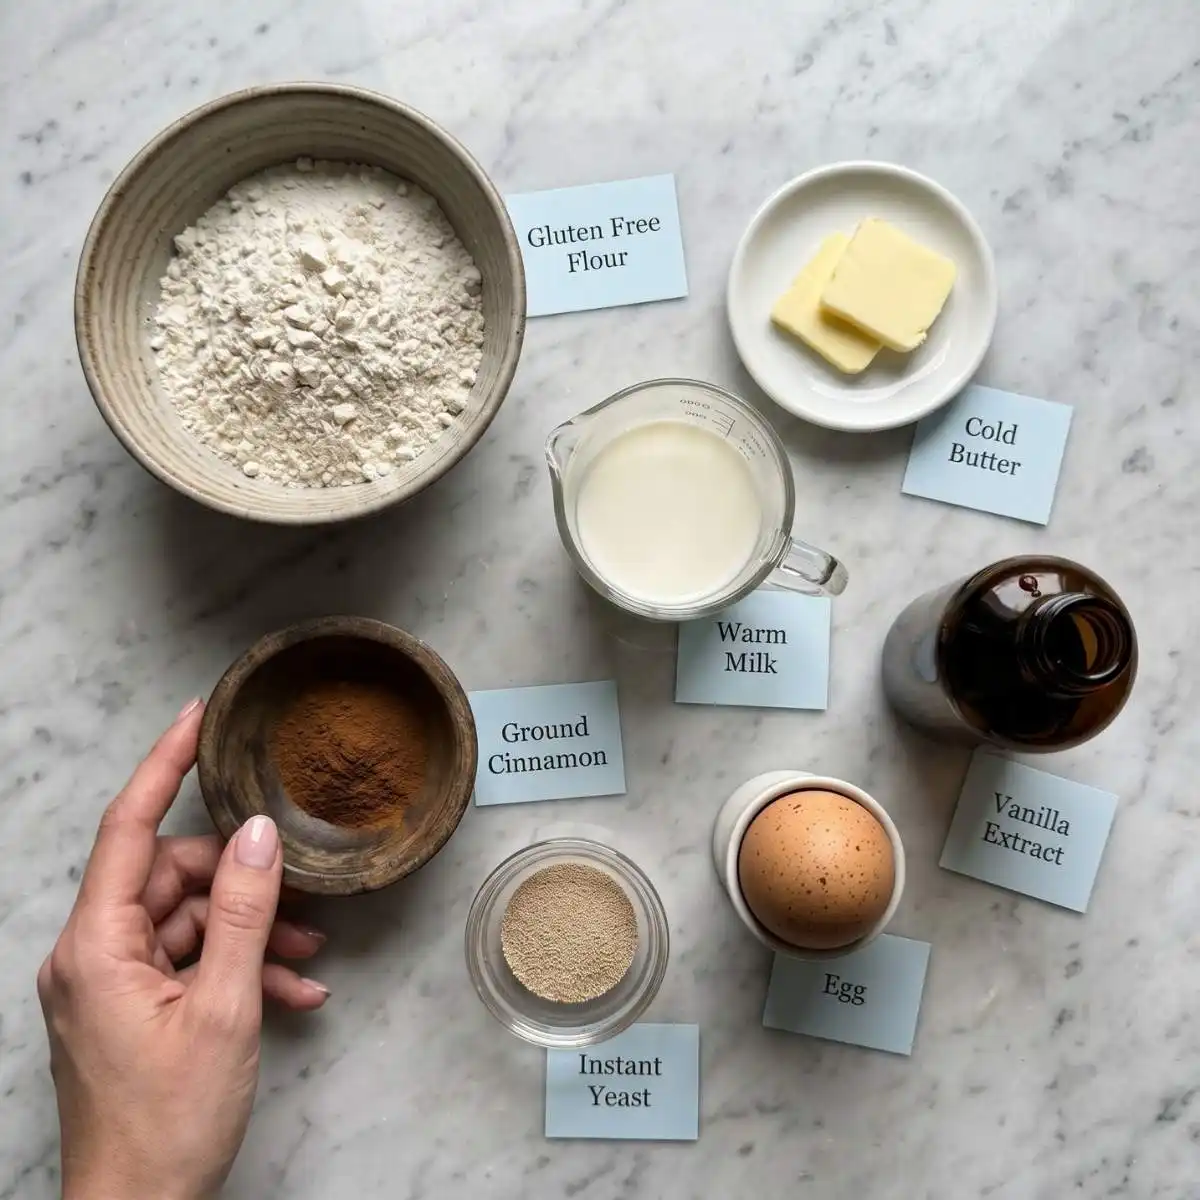
Gluten free flour blend - this is the most important ingredient in the whole recipe. Use a 1:1 gluten free baking flour that already contains xanthan gum. A blend with xanthan gum built in gives the dough the elasticity it needs to roll and layer without crumbling apart. Bob's Red Mill 1-to-1 and King Arthur Measure for Measure are two reliable options. Do not use almond flour or coconut flour here as neither will behave the same way.
Instant yeast - this goes directly into the dry ingredients without needing to be activated separately. It helps the dough rise and gives the cruffins their light, slightly airy texture inside the layers.
Unsalted butter - you need cold butter for the lamination step and softened butter for the filling. These are two different jobs, so do not skip the chill time on the cold butter.
- 2 cups (280g) gluten free 1:1 flour blend
- 2 ¼ teaspoons instant yeast
- 2 tablespoons granulated sugar
- ½ teaspoon fine salt
- ½ cup whole milk, warmed to 105 to 110 degrees F
- 1 large egg, room temperature
- 1 teaspoon vanilla extract
- 2 tablespoons unsalted butter, softened (for dough)
- 4 tablespoons unsalted butter, cold (for lamination)
- 3 tablespoons granulated sugar (for cinnamon sugar coating)
- 1 ½ teaspoons ground cinnamon (for coating)
- 2 tablespoons melted butter (for brushing before rolling)
See recipe card below for full measurements.
Substitutions and Variations for Gluten Free Cruffins
- Dairy-free: swap the whole milk for full-fat oat milk or unsweetened almond milk and use a dairy-free butter stick in place of all the butter. The dough will be slightly softer but will still work.
- Gluten free honey rolls variation: replace the cinnamon sugar coating with a drizzle of warm honey and a sprinkle of flaky sea salt right after baking for a sweet and savory version.
- Gluten free churro recipe style: after rolling in cinnamon sugar, press a small square of dark chocolate into the center of each cruffin before baking for a churro-inspired chocolate center.
- Gluten free cinnamon biscuits variation: if you want a quicker version without the lamination step, skip the folding and simply roll the dough into rounds, fill with cinnamon butter, and shape loosely into the muffin cups. The result is closer to a pull-apart biscuit but still delicious.
- Vanilla glaze: whisk together powdered sugar, a splash of milk, and vanilla extract and drizzle it over the cooled cruffins for a sweeter finish.
This recipe has not been tested with other substitutions or variations. If you replace or add any ingredients, please let us know how it turned out in the comments below!
Equipment for Gluten Free Cruffins
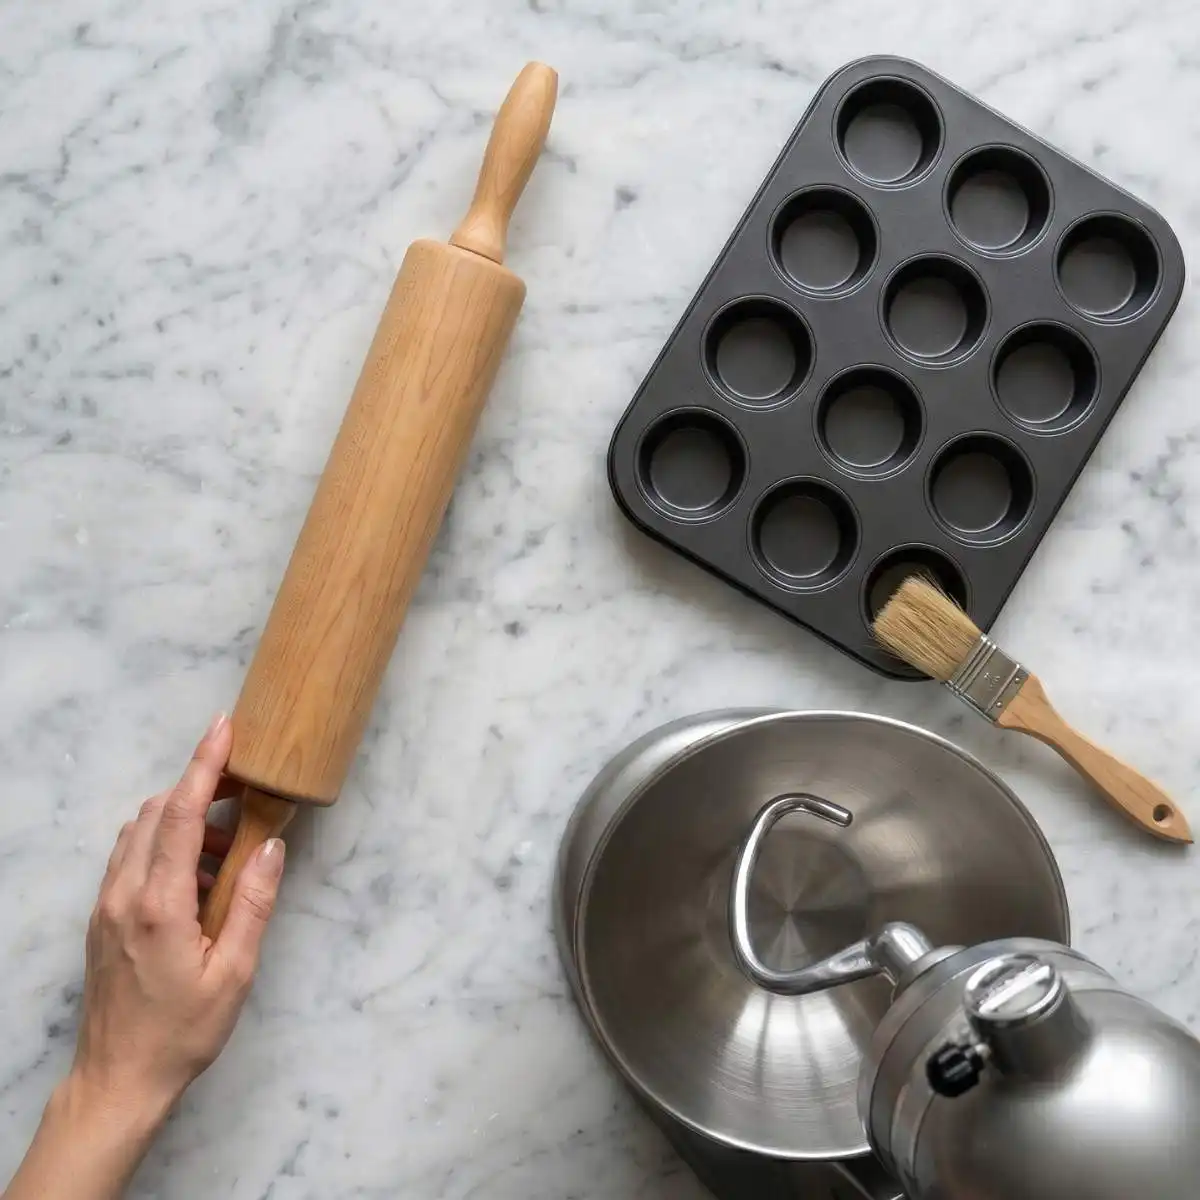
Rolling pin: essential for rolling the dough out thin enough to create distinct layers. A smooth wooden rolling pin or a tapered French pin both work well here.
Muffin tin: a standard 12-cup muffin tin is what you need. Lightly grease each cup with butter or a neutral oil spray so the cruffins release cleanly after baking.
Stand mixer or hand mixer: useful for mixing the enriched dough until it comes together smoothly. You can also mix by hand with a wooden spoon, though it takes a bit more effort.
Pastry brush: helps you apply the melted butter evenly before adding the cinnamon sugar layer. If you do not have one, a spoon works fine.
Kitchen scale: weighing the gluten free flour in grams is the most reliable way to get consistent results. Gluten free flour is easy to over-pack into a measuring cup, and too much flour is the number one reason these turn out dense instead of tender. For more tips on getting the best out of gluten free baking, my gluten free waffles post covers several of the same principles in a simpler format.
How to Make Gluten Free Cruffins
Step-by-Step Directions
Step 1: In a large mixing bowl, whisk together the gluten free flour blend, instant yeast, sugar, and salt until evenly combined. Make sure the yeast is distributed throughout the dry mixture before you add any liquid.
Step 2: In a separate small bowl or measuring cup, whisk together the warmed milk, vanilla extract, and egg until smooth. The milk should feel warm to the touch but not hot. Check that it is between 105 and 110 degrees F before adding it to the dough. Too hot and it will kill the yeast and the dough will not rise.
Step 3: Pour the wet ingredients into the dry ingredients and mix with a hand mixer on medium speed or a stand mixer fitted with a dough hook until a soft, slightly sticky dough forms and no dry streaks of flour remain. Add the 2 tablespoons of softened butter and continue mixing for 2 minutes until the dough is smooth and pulls away cleanly from the sides of the bowl.
Step 4: Cover the bowl with plastic wrap or a clean kitchen towel and let the dough rest at room temperature for 45 minutes until it has puffed up noticeably and looks slightly increased in size. Gluten free enriched dough will not double the way traditional wheat dough does, but you should see a clear lift and a slightly domed surface.
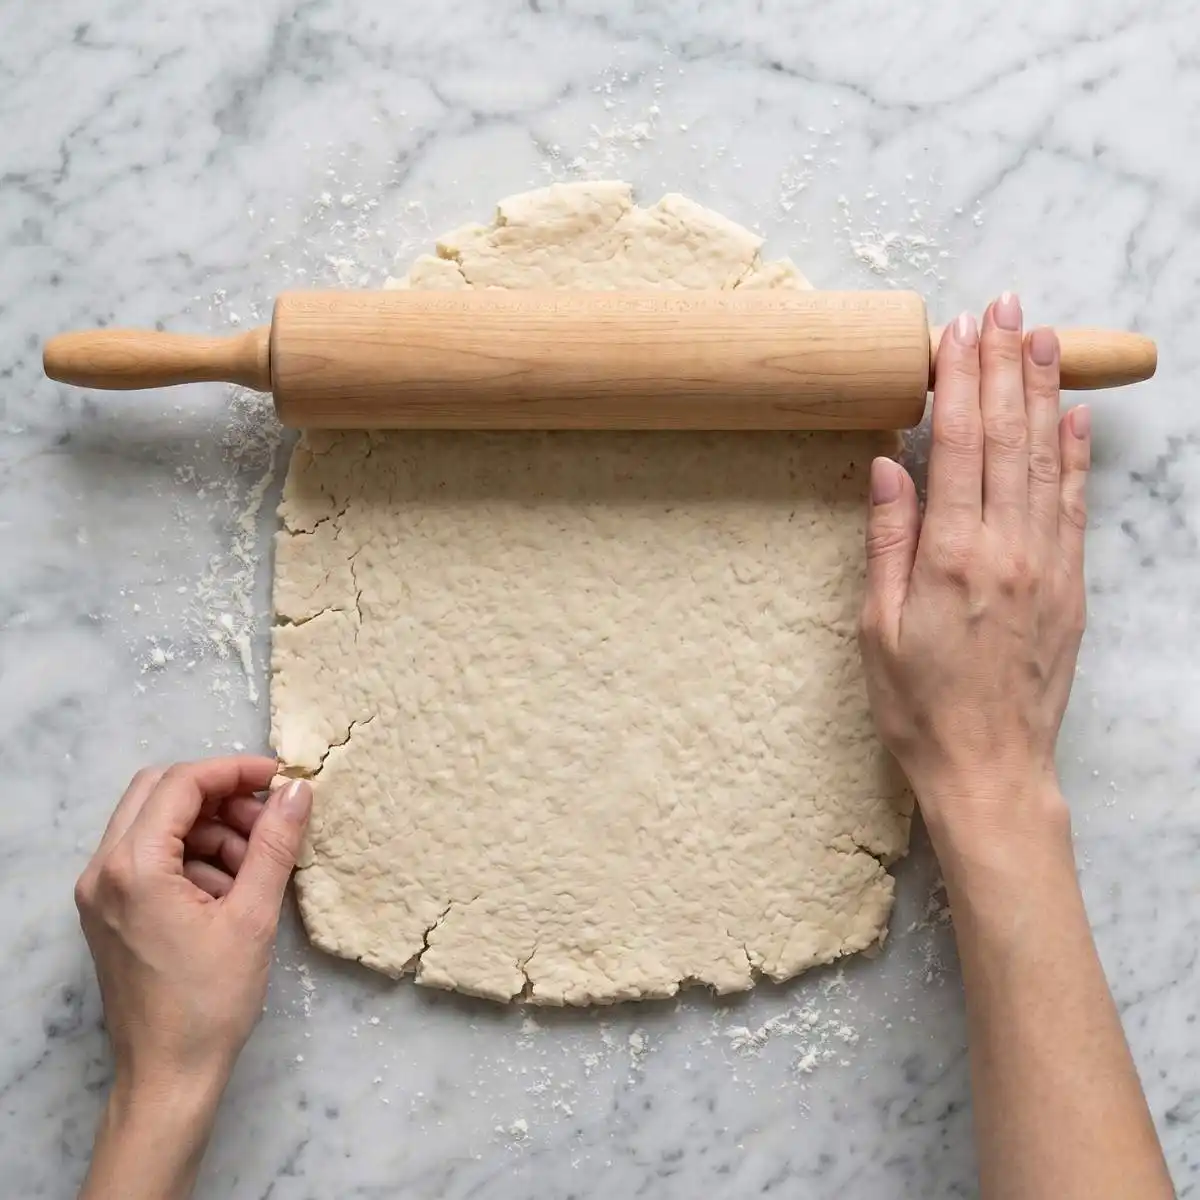
Step 5: Lightly flour a clean surface with a dusting of gluten free flour. Turn the dough out and use a rolling pin to roll it into a thin rectangle, roughly 10 by 14 inches. Work gently and do not rush this step. If the dough cracks at the edges, press it back together with your fingertips and keep rolling.
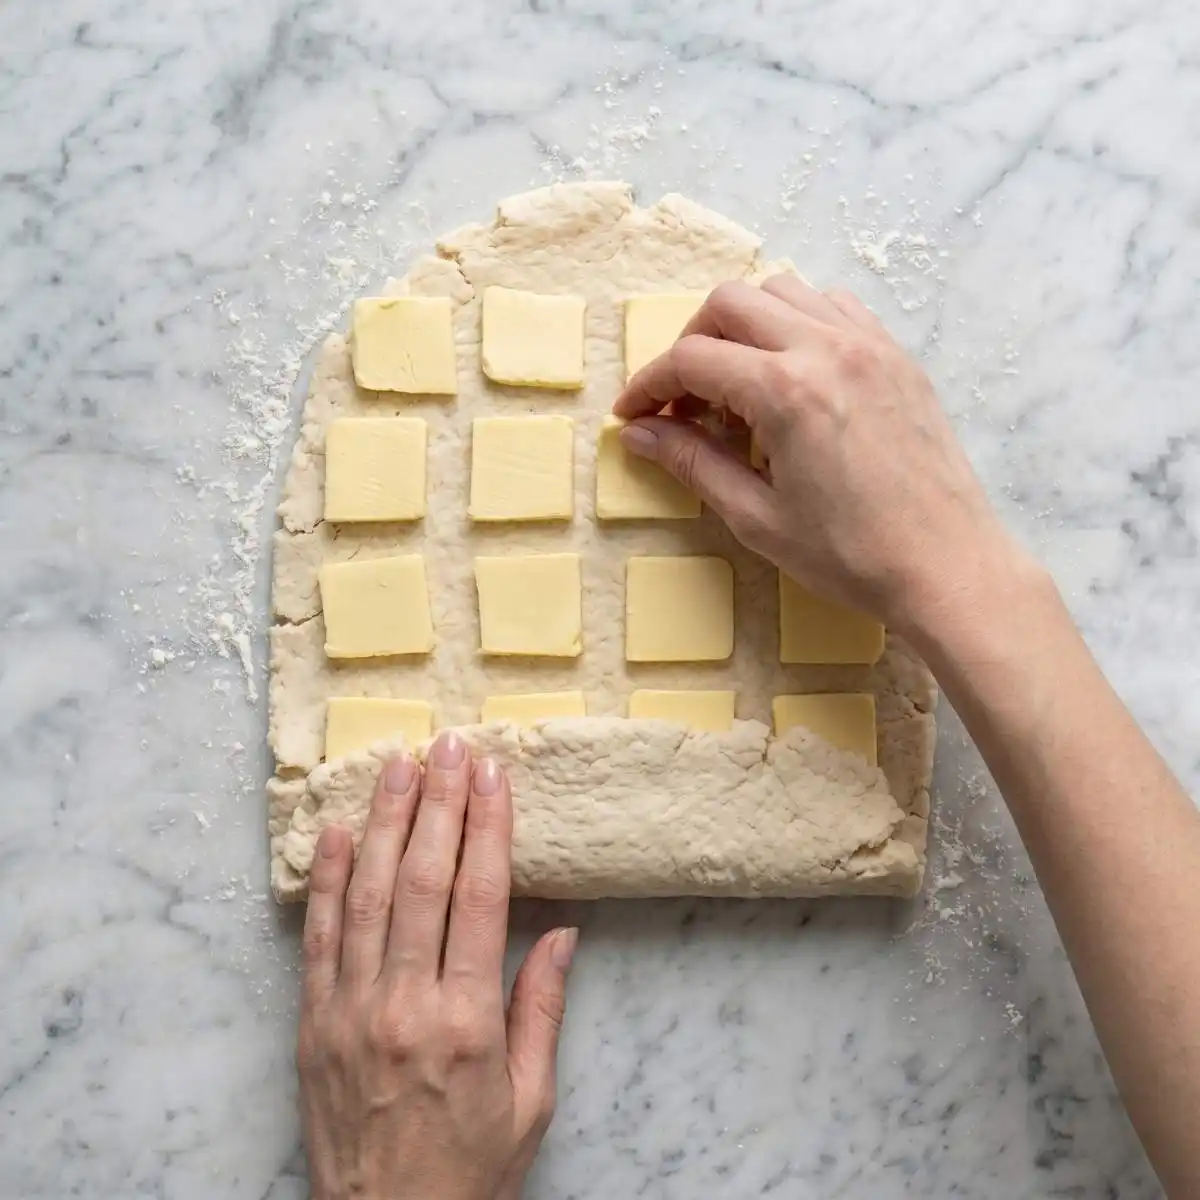
Step 6: Slice the cold butter into thin, even pieces and distribute them across the top two-thirds of the dough rectangle. Fold the bottom third up over the middle, then fold the top third down over that, like folding a letter. This is the start of the lamination that creates the flaky layers. Press the edges together lightly to seal.
Step 7: Wrap the folded dough in plastic wrap and place it in the refrigerator for 20 minutes until the butter firms back up and the dough feels cold to the touch. Do not skip this chill. Warm butter will slide out instead of creating layers.
Step 8: Remove the dough from the fridge and roll it out again into a thin rectangle. Repeat the fold, wrap, and chill process one more time for a second set of layers.
Step 9: After the second chill, roll the dough out one final time into a rectangle about ¼ inch thick. Brush the entire surface generously with the melted butter until shiny and even. Mix the 3 tablespoons of sugar and cinnamon together in a small bowl and sprinkle the mixture evenly over the buttered surface.
Step 10: Starting from the long edge of the rectangle, roll the dough into a tight log, just as you would for cinnamon rolls. Use a sharp knife to slice the log into 6 equal rounds, each about 1.5 to 2 inches thick.
Step 11: Stand each round cut-side up in a greased muffin cup. The spiral should face upward so the layers fan out as they bake. Press gently to seat each one without flattening the spiral. Cover the tin loosely with plastic wrap and let the cruffins rest for 20 minutes until they look slightly puffed.
Step 12: Preheat your oven to 375 degrees F. Bake the cruffins for 20 to 24 minutes until the tops are deep golden brown, the edges look set, and the kitchen smells warm and toasty with cinnamon. A toothpick inserted into the center of one should come out clean with no wet dough clinging to it.
Step 13: Remove from the oven and let the cruffins cool in the pan for 5 minutes. Then brush the tops with a little extra melted butter and roll each cruffin gently in additional cinnamon sugar while still warm so the coating sticks. Transfer to a wire rack to finish cooling.
Expert Tips for Gluten Free Cruffins
- Use a flour blend with xanthan gum already included. Gluten free flour without xanthan gum will produce a crumbly dough that tears during rolling and does not hold the spiral shape. Check the ingredient list on your bag before you start. If your blend does not contain xanthan gum, add ½ teaspoon per cup of flour.
- Do not skip the chilling steps. The two rest periods in the refrigerator are what create the distinct layered texture inside these cruffins. When the butter warms up too fast it absorbs into the dough instead of creating separate flaky layers. Keep the dough cold and the layers will stay defined.
- Roll the log tightly. A loose roll means the layers will separate and collapse in the muffin cup instead of puffing up into a beautiful swirl. Roll firmly from one end to the other, keeping even pressure, and press the seam edge down to seal it before slicing.
- Coat in cinnamon sugar while warm. The butter brushed on right after baking creates the adhesive that holds the cinnamon sugar to the surface. If you wait until the cruffins are fully cool, the coating will not stick as well and you will lose that satisfying sugary crust. If you love this kind of cinnamon coating technique, my blueberry muffins use a similar finishing method with great results.
- Measure the flour by weight. Gluten free flour blends vary significantly in density between brands. Measuring in grams is the only reliable way to get consistent results every time. If you do not have a kitchen scale, spoon the flour into the measuring cup and level it off with a straight edge. Never scoop directly from the bag or you will compact too much flour into the cup.
Storage Tips for Gluten Free Cruffins
These cruffins are at their very best on the day they are baked, when the layers are still distinct and the cinnamon sugar coating has a slight crunch.
Room Temperature: Store in an airtight container at room temperature for up to 2 days. The texture will soften slightly after day one, but they still taste great.
Fridge: Refrigerate in a sealed container for up to 4 days. Warm them in the microwave for 15 to 20 seconds or in a 300 degree oven for 5 minutes to bring back some of the softness.
Freezer: These freeze well. Place fully cooled cruffins in a zip-top freezer bag with the air pressed out and freeze for up to 2 months. Thaw at room temperature and warm briefly in the oven before serving.
FAQ about Gluten Free Cruffins
What are common gluten-free pastry mistakes?
The most common mistake is using the wrong flour blend. A gluten free flour without xanthan gum or a binding agent will fall apart when you try to roll and shape it. The second biggest issue is skipping rest and chill time. Gluten free dough needs that rest period to hydrate fully and hold together. Rushing it leads to cracking, tearing, and a dense final texture.
Is there such a thing as gluten-free croissants?
Yes, there are gluten free croissants, and these cruffins are built on the same idea. Traditional croissants rely on gluten development in the dough to hold all those buttery layers together, so the gluten free version requires a high-quality 1:1 flour blend and careful cold butter lamination to achieve a similar result. It takes a bit more patience than a standard gluten free muffin, but the flaky layered texture is absolutely achievable.
What dough is used for cruffins?
Traditional cruffins are made with a laminated enriched dough, which is a yeasted dough with butter folded into it in layers, similar to croissant dough but shaped in a muffin tin. This gluten free version follows the same method using a gluten free enriched dough. You whisk together the milk, vanilla extract, and egg for the wet base, build a soft yeast dough, then fold cold butter in to create those signature layers.
What are the common problems with gluten-free cake?
The most common problems with gluten free baking in general, including cakes, are a dense crumb, dry texture, and a gummy center. These usually come from too much flour, not enough binding agent, or under-baking. Using a 1:1 flour blend with xanthan gum, measuring by weight, and baking until a toothpick comes out completely clean are the three changes that solve most of these issues. The same principles apply when you make gluten free cruffins, which is why the flour choice and the chill time matter so much in this recipe.
Related
Looking for other recipes like this? Try these:


Pairing
These are my favorite dishes to serve with Gluten Free Cruffins:

📖 Recipe
Easy Gluten Free Cruffins with Cinnamon Sugar
Ingredients
Equipment
Method
- In your favorite large mixing bowl, whisk together the gluten free 1:1 flour blend, instant yeast, granulated sugar, and fine salt. I always make sure the yeast is tucked into the flour before adding any liquids, it's a little trick I learned to keep the yeast happy!
- In a smaller bowl, whisk the warmed whole milk, vanilla extract, and egg. Make sure that milk isn't too hot-it should feel like a warm bath. We want to wake the yeast up, not scald it!
- Pour your wet mixture into the dry ingredients. Mix using your hand mixer or stand mixer until a soft dough forms. Add the softened unsalted butter and keep mixing for 2 minutes. The dough should look smooth and pull away from the bowl, just like the dough my grandmother used to make for her Sunday rolls.
- Cover the bowl snugly with plastic wrap. Let it sit in a warm, draft-free spot for 45 minutes. It won't double in size like traditional dough, but you'll see it puff up beautifully. It's the perfect time to grab a cup of coffee!
- On a floured surface, roll the dough into a 10x14 inch rectangle. Distribute thin slices of cold unsalted butter over the top two-thirds. Fold the bottom up and the top down-just like folding a letter. This is where those magical layers are born!
- Wrap your dough and pop it in the fridge for 20 minutes. You'll repeat the rolling and folding process once more after this. Keeping that butter cold is the secret to a cruffin that "shatters" when you bite into it!
- After the final chill, roll the dough out and brush with melted butter. Sprinkle your granulated sugar and ground cinnamon mixture all over. Roll it up tightly into a log-think of it as a cozy sleeping bag-and slice into 6 equal rounds.
- Place the spirals cut-side up in your muffin tin. Let them rest for 20 minutes, then bake at 375°F for 20-24 minutes. Your kitchen is going to smell like a dream! They are ready when they are a deep, gorgeous golden brown.
- While they are still warm, brush with a little extra butter and roll them in more cinnamon sugar. This creates that sweet, crunchy crust that Emma loves so much. Transfer to a wire rack to cool... if you can wait that long!