Growing up, I watched Matilda more times than I can count, and that chocolate cake scene never got old. Every single time, I sat there thinking about what that cake must actually taste like - the deep, dark layers, the thick fudge frosting piled on without a single apology. This matilda chocolate cake is my homemade version of that legendary dessert, and I promise it lives up to every bit of the imagination. Three layers of incredibly moist chocolate cake are draped in a silky, fudgy frosting that sets up beautifully and slices like a dream. It is the best chocolate cake recipe I have ever made, and I have made a lot of them.
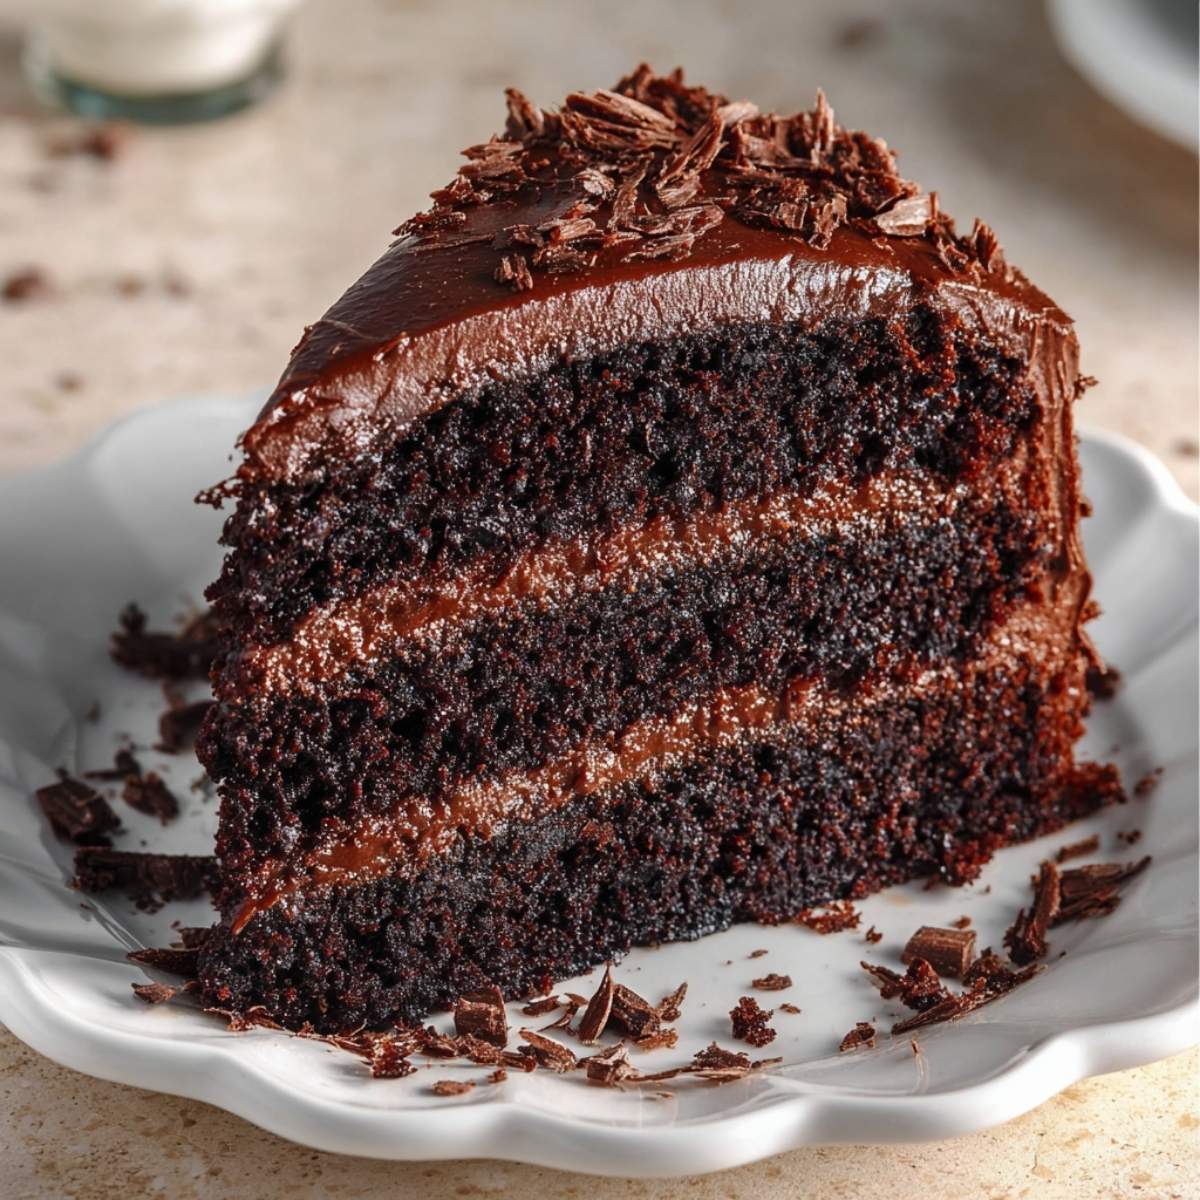
Emma and I watched Matilda together on a rainy Saturday afternoon and the moment that chocolate cake appeared on screen, Emma turned to me and said "Mom, can you make that?" I told her I would try. We spent that whole evening in the kitchen together and the result was so good that we watched the movie again the following weekend just to have an excuse to bake it. If you love baking indulgent desserts from scratch, my lemon truffles are another one Emma always requests and they come together in under 30 minutes.
Jump to:
- Why You'll Love This Matilda Chocolate Cake
- Ingredients for Matilda Chocolate Cake
- Substitutions and Variations for Matilda Chocolate Cake
- Equipment for Matilda Chocolate Cake
- How to Make Matilda Chocolate Cake
- Expert Tips for Matilda Chocolate Cake
- Storage Tips for Matilda Chocolate Cake
- FAQ about Matilda Chocolate Cake
- Related
- Pairing
- 📖 Recipe
Why You'll Love This Matilda Chocolate Cake
- This is a true from-scratch chocolate cake with no box mix shortcuts, and the texture shows it - dense, moist, and deeply chocolatey in every single bite.
- The chocolate fudge frosting uses real dark chocolate and cream cheese together, which gives it a richness and stability that buttercream just cannot match.
- Three layers means more frosting in every slice, and this recipe makes plenty of frosting so you do not have to ration it.
- The batter comes together in two bowls with a whisk - no stand mixer required for the cake itself, which keeps cleanup simple.
- This is a genuinely kid-approved, crowd-pleasing homemade chocolate cake recipe that works for birthdays, movie nights, or any occasion that calls for something truly special.
Ingredients for Matilda Chocolate Cake
Here is everything you need to make this matilda chocolate cake recipe from scratch. Most of the pantry staples are probably already in your kitchen.
What You'll Need
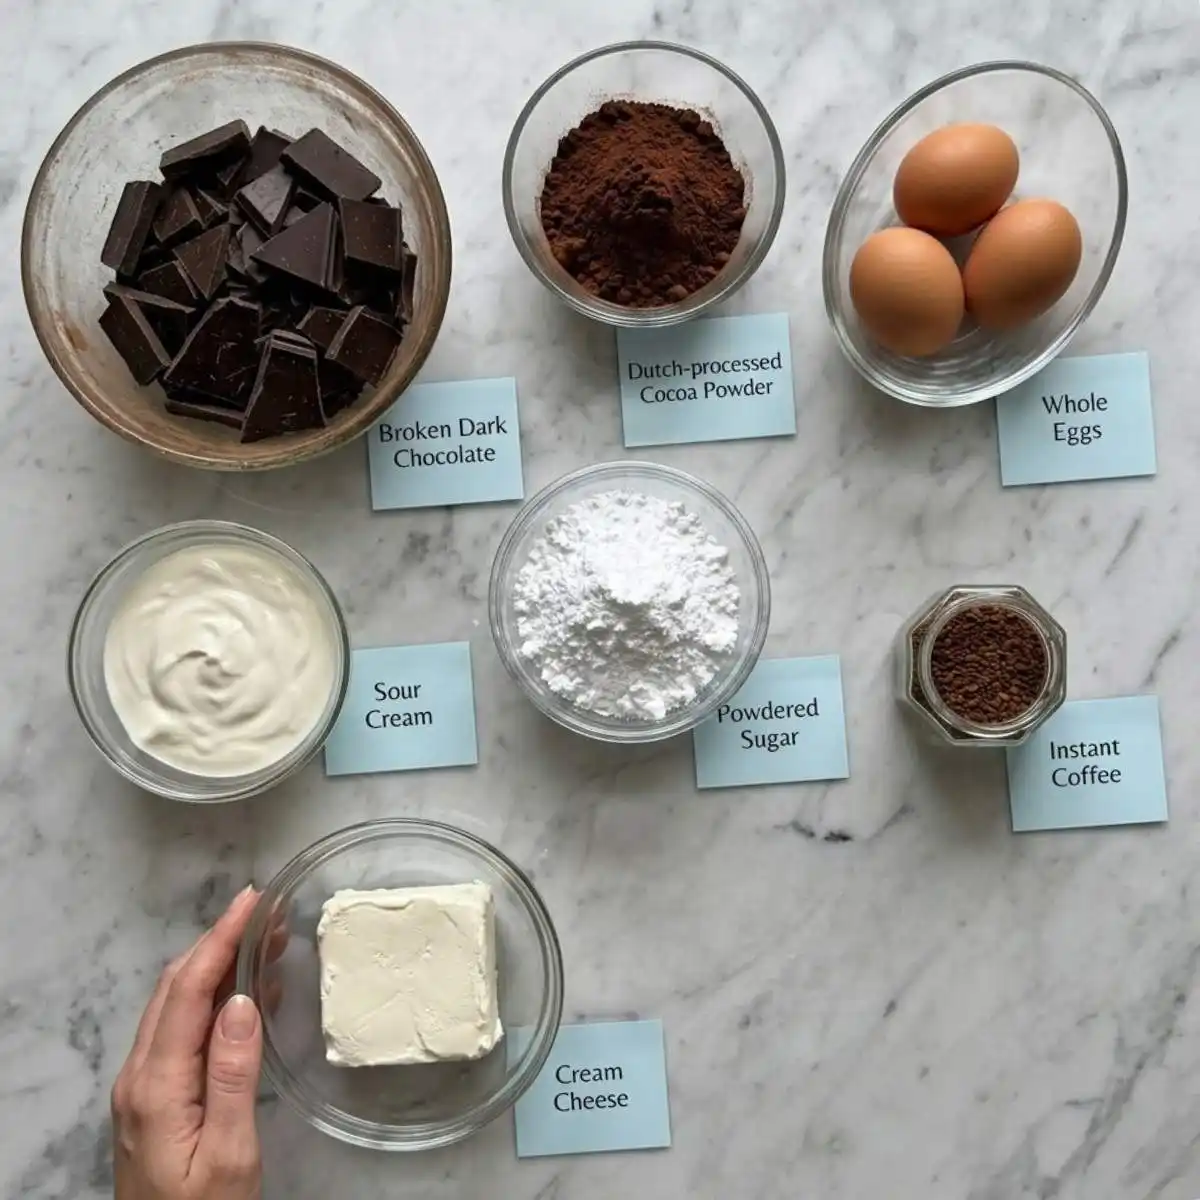
Dutch-processed cocoa powder - this is the cocoa that gives the cake its deep, almost black color and rich chocolate flavor. Regular natural cocoa powder will work but the color and intensity will be noticeably lighter. Dutch-processed is worth seeking out for this one.
Instant coffee - do not skip this. The instant coffee does not make the cake taste like coffee at all. It amplifies the chocolate flavor and gives the cake that dark, complex depth that makes this recipe taste like the best chocolate cake you have ever had.
Sour cream - this is what makes the crumb so incredibly moist and tender. It adds fat and acidity that keeps each layer soft for days. Use full-fat sour cream for the best result.
Dark chocolate (for the frosting) - use good quality dark chocolate here, ideally 60 to 70 percent cacao. The frosting is built around it, so the quality of the chocolate matters more than in a typical recipe.
For the Chocolate Cake:
- 2 cups all-purpose flour (260g), sifted
- 1 ½ teaspoon baking powder
- 1 ½ teaspoon baking soda
- 1 cup granulated sugar (200g)
- ⅔ cup light brown sugar (135g)
- 1 teaspoon salt
- 3 large eggs, room temperature
- ⅔ cup vegetable oil (133g)
- ⅓ cup buttermilk (or ⅓ cup whole milk plus 1 teaspoon white vinegar)
- 1 cup sour cream (240g), room temperature
- ¾ cup Dutch-processed cocoa powder (75g)
- 2 teaspoon instant coffee
- ¾ cup boiling water (180g)
For the Chocolate Fudge Frosting:
- 300g dark chocolate (60 to 70% cacao)
- 3 tablespoon corn syrup
- 8 oz cream cheese (226g), room temperature
- ⅓ cup cocoa powder (33g)
- 1 cup powdered sugar (100g)
- ¼ teaspoon salt
- 1 ¼ cups heavy cream, chilled
See recipe card below for full measurements.
Substitutions and Variations for Matilda Chocolate Cake
- Buttermilk substitute: if you do not have buttermilk, mix ⅓ cup of whole milk with 1 teaspoon of white vinegar and let it sit for 5 minutes before using. It works exactly the same way in the batter.
- Sour cream alternative: full-fat plain Greek yogurt can replace the sour cream in a 1:1 ratio. The cake will still be moist and tender, though very slightly less rich.
- For a mocha version: increase the instant coffee to 1 tablespoon and add ½ teaspoon of espresso powder to the frosting along with the cocoa.
- Gluten-free option: a good 1:1 gluten-free all-purpose flour blend can replace the regular flour, though I recommend weighing it in grams for accuracy since gluten-free flours vary widely in density.
- Corn syrup in the frosting: if you do not have corn syrup, golden syrup works as a substitute and gives a very similar result in terms of shine and texture.
This recipe has not been tested with other substitutions or variations. If you replace or add any ingredients, please let us know how it turned out in the comments below!
Equipment for Matilda Chocolate Cake
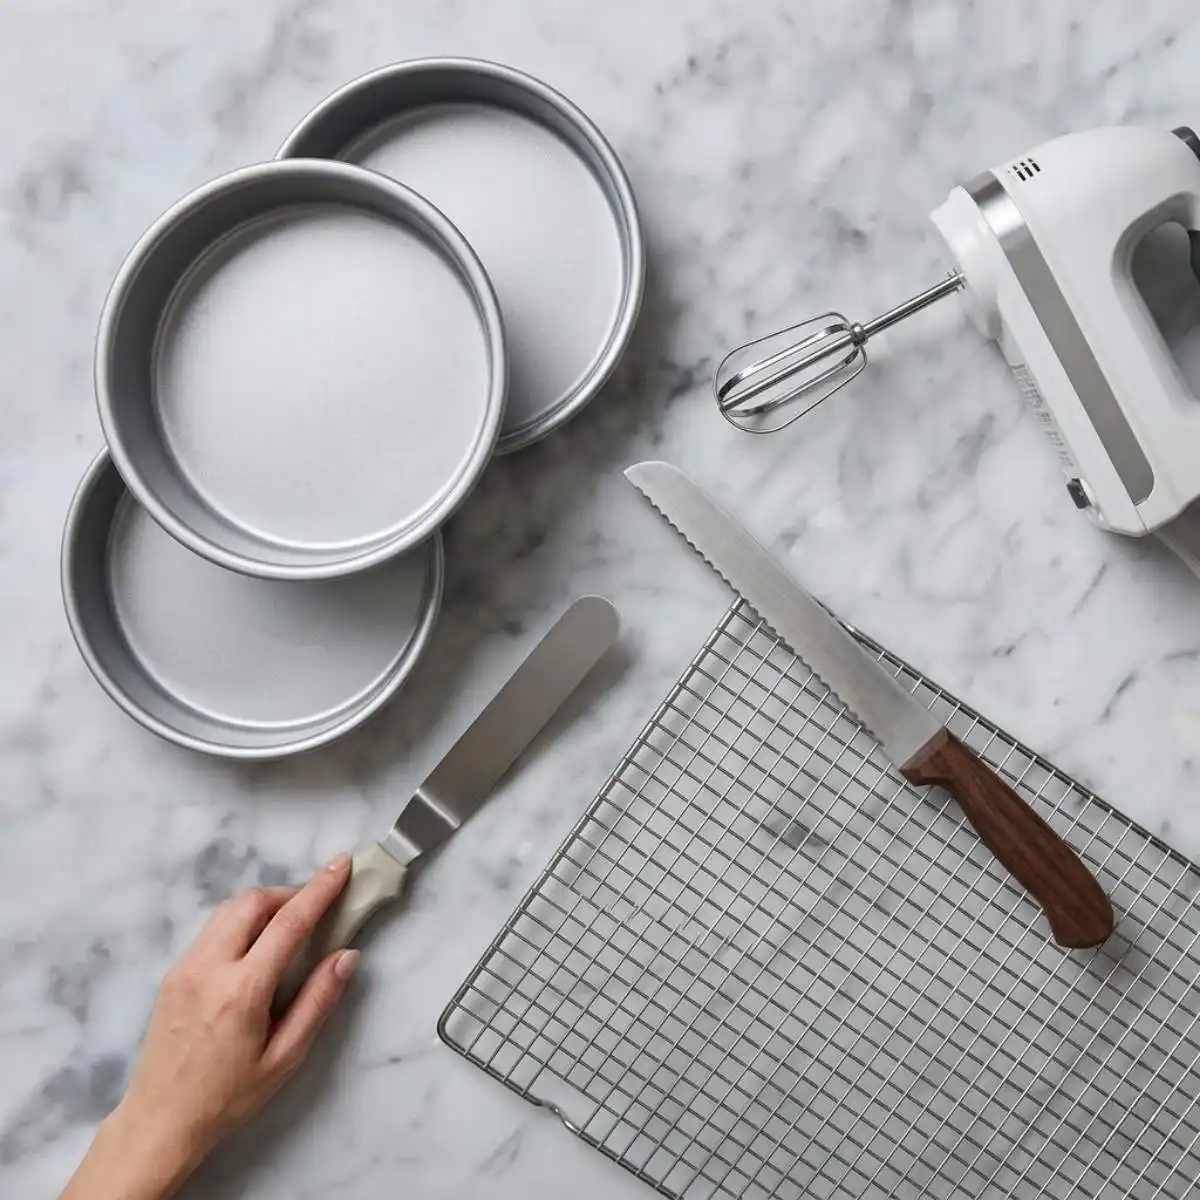
Three 8-inch round cake pans - this recipe is designed for three 8-inch pans, which gives you the three distinct layers you see in the Matilda cake scene. If you only have two pans, bake in batches and let the pans cool fully between uses.
Stand mixer or hand mixer - you will need a mixer for the frosting since it needs to whip the cream cheese and heavy cream to a fluffy, stable consistency. A hand mixer works perfectly well here.
Kitchen scale - for a cake this important, I strongly recommend weighing your ingredients in grams. Flour, cocoa, and sugar are all easy to over-measure with cups, and even a small error in a layer cake shows up in the final texture. My pretzel bites recipe has a full note on why weighing makes such a difference in baked goods.
Large serrated knife - you will need this to trim the domed tops off each cake layer before assembly. Flat layers stack more evenly and the cake holds together much better when sliced.
Wire cooling rack - essential for getting the layers fully cooled before frosting. Frosting a warm cake will melt the frosting and cause the layers to slide.
Offset spatula - makes spreading the frosting between layers and over the outside of the cake much easier and cleaner. A butter knife works in a pinch but the offset angle gives you much better control.
How to Make Matilda Chocolate Cake
Step-by-Step Directions
Step 1: Preheat your oven to 350°F. Grease three 8-inch round cake pans, line the bottoms with parchment paper, and butter the parchment. This extra step means the cakes release cleanly without sticking.
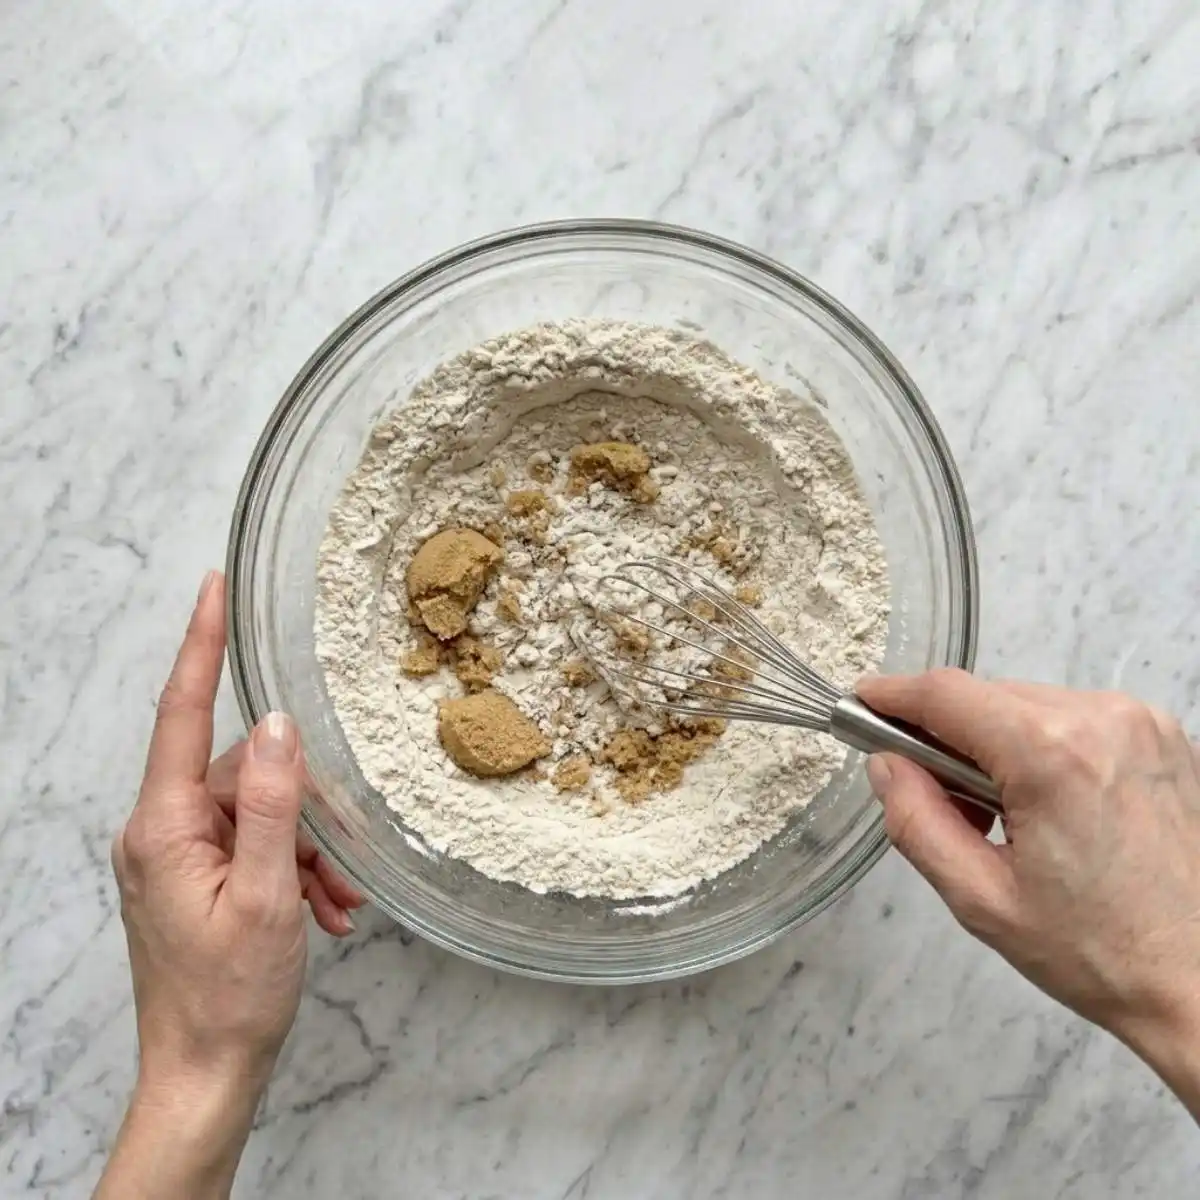
Step 2: In a large bowl, whisk together the sifted flour, baking powder, baking soda, granulated sugar, light brown sugar, and salt until the mixture is uniform and no lumps remain.
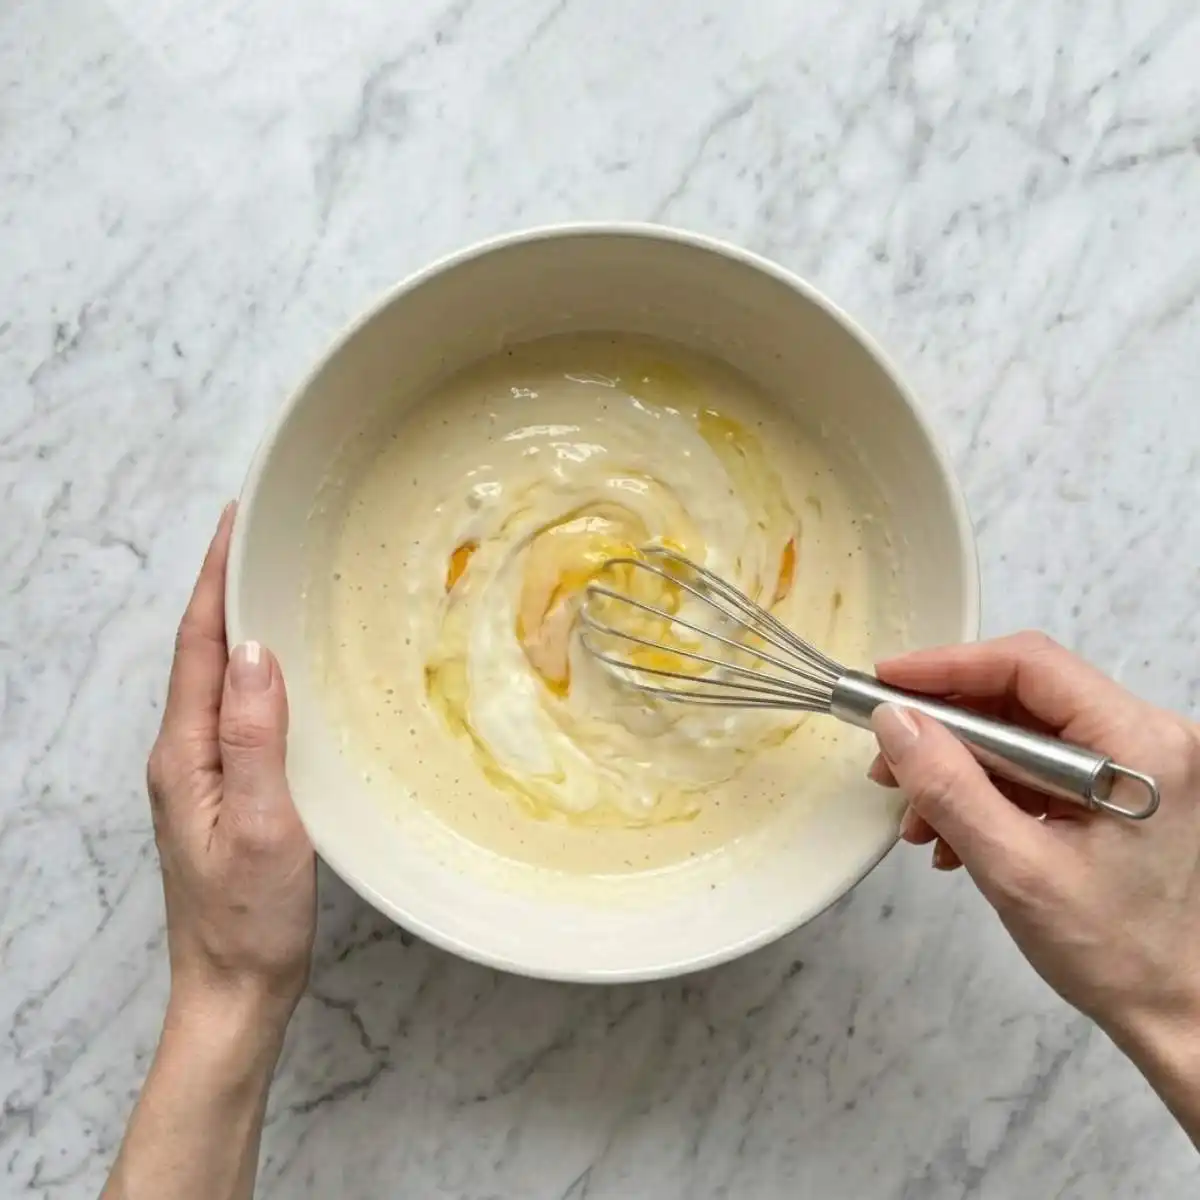
Step 3: In a separate bowl, whisk together the eggs, vegetable oil, buttermilk, and room-temperature sour cream until the mixture is smooth and fully combined. The oil and sour cream together are what make this batter so rich.
Step 4: Add the dry ingredients to the wet ingredients in two additions, gently whisking and folding after each one until just combined and no large flour streaks remain. Stop mixing the moment the batter comes together. Over-mixing at this stage will develop gluten and make the cake tough instead of tender.
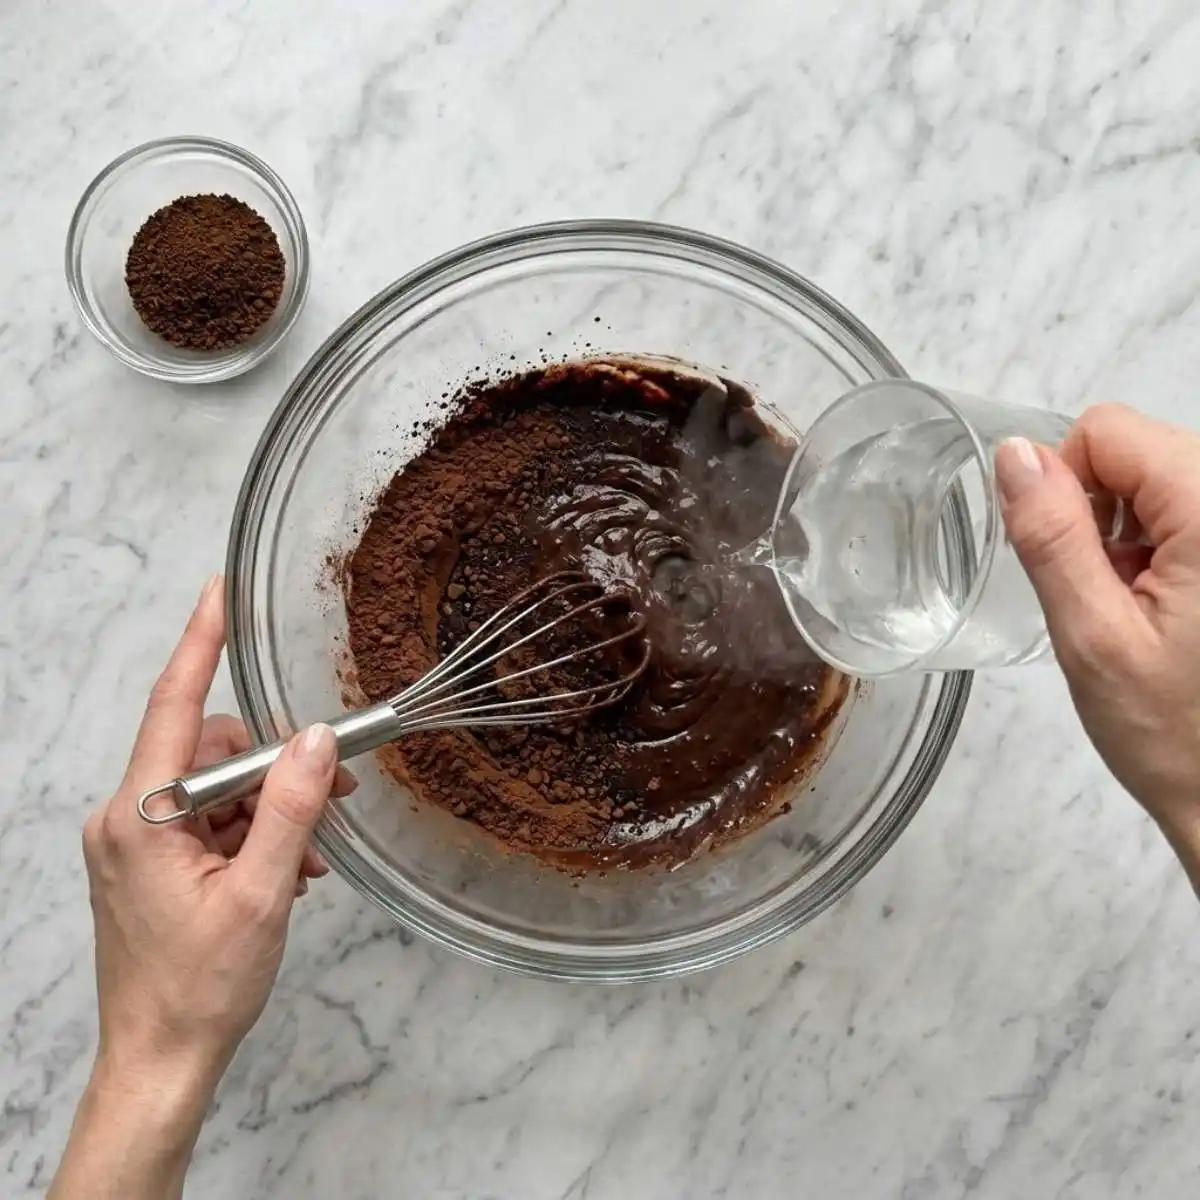
Step 5: In a small bowl, combine the cocoa powder and instant coffee. Pour the boiling water directly over the cocoa mixture and whisk vigorously until a smooth, glossy, dark paste forms with no dry cocoa visible.
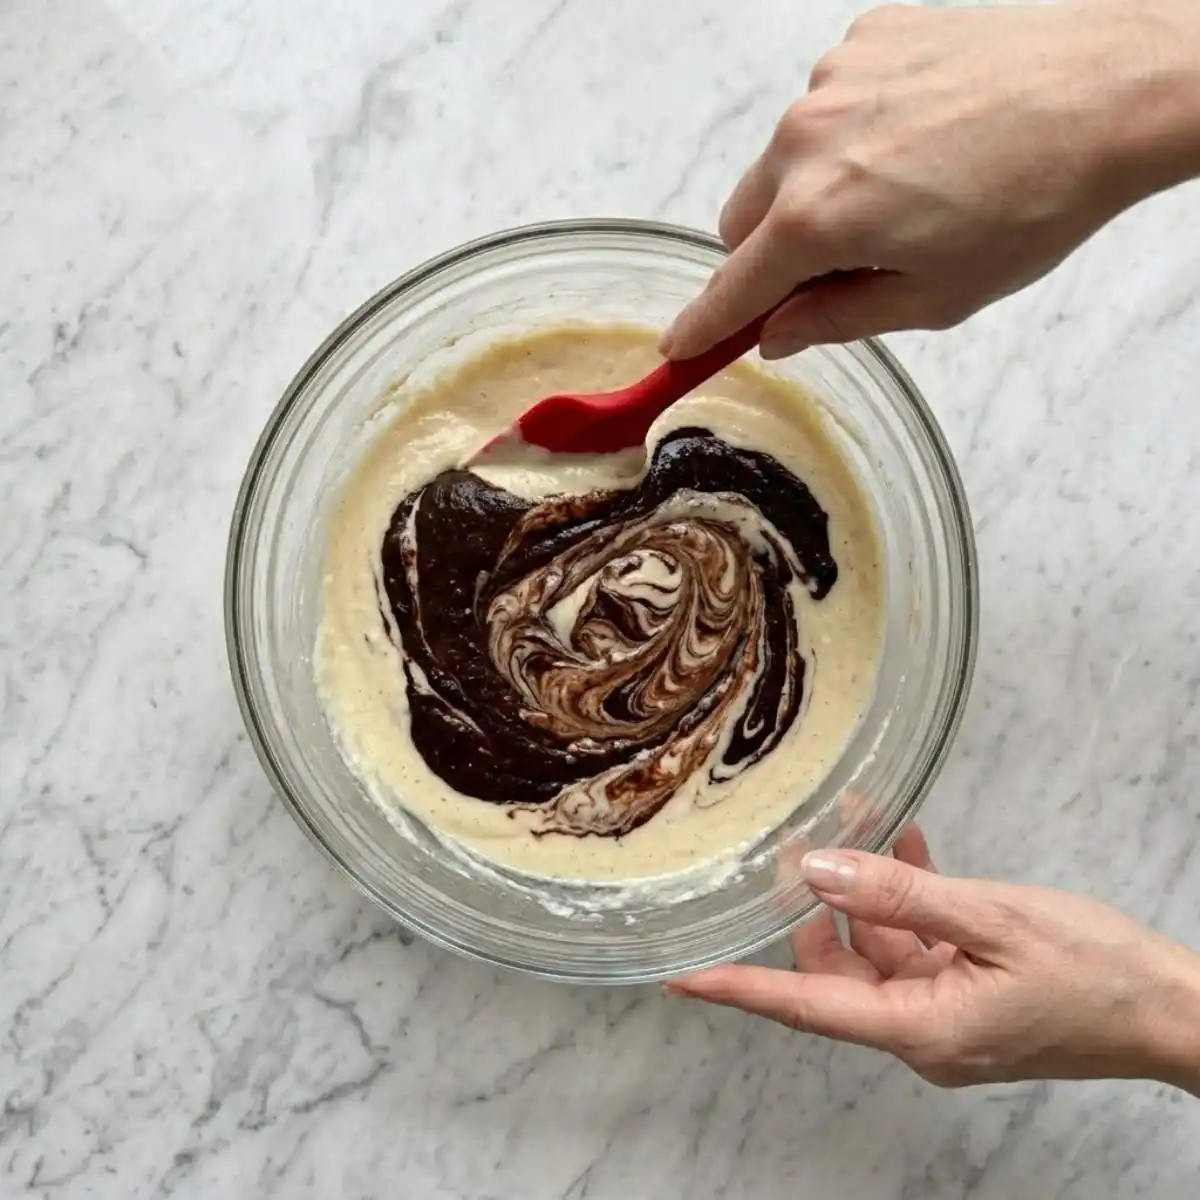
Step 6: Pour the cocoa paste into the cake batter and gently fold it in with a spatula until the batter is uniform and deeply chocolate-colored throughout. A few gentle folds is all it takes.
Step 7: Divide the batter as evenly as possible between the three prepared pans. If you have a kitchen scale, weigh each pan to make sure the layers bake up the same height.
Step 8: Bake for 22 to 24 minutes until a toothpick inserted into the center comes out with just a few moist crumbs attached. You do not want a clean toothpick here - a completely dry toothpick means the cake is already over-baked.
Step 9: Let the cakes cool in their pans for 20 minutes, then carefully turn them out onto a wire rack. For the best results, refrigerate the layers for at least 1 hour before assembly. Cold cake layers are easier to trim, stack, and frost without crumbling.
Step 10: While the cakes are cooling, make the chocolate fudge frosting. Add the dark chocolate and corn syrup to a small saucepan and heat over the lowest possible flame, stirring constantly, until the chocolate is fully melted and glossy. Watch it closely - chocolate scorches easily at this step and seized chocolate cannot be fixed. Remove from heat and set aside to cool slightly.
Step 11: In the bowl of your stand mixer fitted with the paddle attachment, combine the room-temperature cream cheese, sifted cocoa powder, powdered sugar, and salt. Beat on medium speed for 1 to 2 minutes until the mixture is completely smooth and creamy. Scrape down the bowl thoroughly.
Step 12: Switch to the whisk attachment and add the chilled heavy cream. Start on low speed and gradually increase until the mixture becomes light, fluffy, and holds its shape. Stop the mixer the moment it reaches a fluffy, whipped consistency. Over-whipping this frosting will cause it to turn grainy.
Step 13: Check that the melted chocolate is warm and pourable but not hot enough to melt the frosting. With the mixer on low speed, slowly pour the melted chocolate into the cream cheese mixture in a steady stream until fully combined. The frosting will become more fluid at this point - that is completely normal and expected.
Step 14: Let the frosting rest at room temperature for about 30 minutes until it becomes thick enough to spread. If it firms up too much in the fridge, scoop out about 1 cup, microwave it for just a few seconds until warm and fluid, then whisk it back into the rest of the frosting to loosen it.
Step 15: To assemble, use your serrated knife to carefully trim the domed top off each cake layer so the surface is flat. Place the first layer on your cake stand or plate. Spread a generous layer of frosting over the top - do not be stingy here. Place the second layer on top, add another generous layer of frosting, then place the third layer.
Step 16: Apply a thin crumb coat of frosting all over the outside of the cake and refrigerate for 20 minutes until the crumb coat is set and firm. Then spread the remaining frosting all over the top and sides of the cake in a thick, rustic layer.
Once assembled, refrigerate the cake for at least 30 minutes before slicing so the layers hold together cleanly. If you love rich, layered chocolate desserts, my red velvet cheesecake brownies are another recipe worth trying next.
Expert Tips for Matilda Chocolate Cake
- Use room-temperature eggs, sour cream, and cream cheese. Cold ingredients do not incorporate as smoothly and can cause the batter or frosting to appear lumpy or curdled. Pull everything out of the fridge at least 45 minutes before you start. This one step makes a noticeable difference in the final texture of both the cake and the frosting.
- Measure your flour in grams using a kitchen scale. Flour is the ingredient most often over-measured when using cups, and too much flour is the number one reason homemade chocolate cakes turn out dry and dense instead of moist. The difference between 260g and a slightly over-packed 2-cup scoop can be significant. If you do not have a scale, spoon the flour into the measuring cup and level it off with a straight edge - never scoop directly from the bag.
- Do not skip the refrigeration step after baking. Cold cake layers are far easier to work with during assembly. A warm or room-temperature layer will crumble when you trim it, slide when you stack it, and cause the frosting to drag and pull. One hour in the fridge makes assembly significantly cleaner and less stressful.
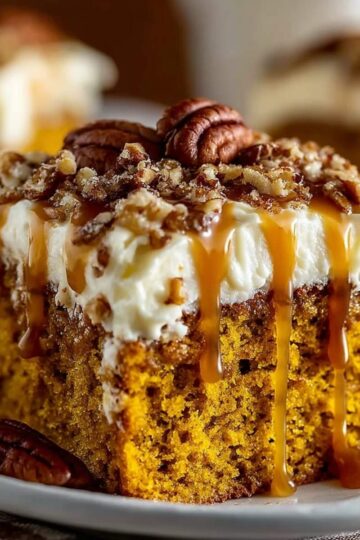
- Let the melted chocolate cool before adding it to the frosting. If the chocolate is too hot when it hits the cream cheese mixture, it can cause the frosting to separate or become greasy. It should be warm and fluid but comfortable to touch on the inside of your wrist before you add it. If you love this style of fudge frosting, my pumpkin cake uses a similarly rich cream cheese-based frosting that is worth exploring for fall baking.
- The crumb coat is not optional. Applying a thin layer of frosting first and chilling it for 20 minutes seals in all the loose crumbs so your final coat looks clean and smooth. Skipping this step almost always means crumbs showing through the final layer of frosting.
Storage Tips for Matilda Chocolate Cake
Store the assembled cake in an airtight container or covered with plastic wrap in the refrigerator for up to 4 days. The frosting contains cream cheese and heavy cream, so it needs to stay chilled. Do not freeze this cake once it has been frosted - the cream-based frosting will separate when frozen and the texture will not recover. If you want to freeze the unfrosted cake layers, wrap each one tightly in plastic wrap and freeze for up to 2 months, then thaw in the refrigerator overnight before assembling. The cake tastes best when sliced at room temperature, so take it out of the fridge about 20 to 30 minutes before serving.
FAQ about Matilda Chocolate Cake
What is the chocolate cake in Matilda?
The chocolate cake in the 1996 film Matilda is the oversized, towering chocolate fudge cake that the headmistress Miss Trunchbull forces the student Bruce Bogtrotter to eat in its entirety in front of the whole school. The scene is one of the most iconic moments in the film and has inspired countless home bakers to recreate what is now widely called the Bruce chocolate cake or Matilda cake. It is described and shown as an incredibly dark, rich, fudgy chocolate layer cake - exactly the style of cake this recipe recreates.
Why is it called a Matilda cake?
It is called a Matilda cake simply because the chocolate cake scene in the film Matilda made such a lasting impression on everyone who watched it. The cake became so culturally recognizable from that scene that home bakers and food bloggers started calling any deeply rich, old-fashioned chocolate layer cake with fudge frosting a Matilda cake. It is more of a cultural nickname than an official recipe name, but it perfectly describes the style - dark, dramatic, and completely over-the-top in the best way.
What is so special about Matilda cake?
What makes the Matilda chocolate cake so special is the combination of an incredibly moist, deeply flavored chocolate crumb with a rich fudge frosting that is thicker and more intense than a standard chocolate buttercream. The use of sour cream in the batter keeps each layer tender for days, and the dark chocolate and cream cheese frosting gives it a depth of flavor that is hard to achieve with cocoa alone. It is genuinely one of the best chocolate cake recipes you can make from scratch, and it looks as impressive as it tastes.
How to make a chocolate Matilda cake?
To make a Matilda chocolate cake from scratch, you build a three-layer moist chocolate cake using cocoa powder, instant coffee, sour cream, and boiling water to create an incredibly deep chocolate flavor, then frost it with a fudge frosting made from melted dark chocolate, cream cheese, and whipped heavy cream. The full step-by-step directions are above in this recipe, including all the tips for getting the layers flat, the frosting spreadable, and the assembly clean. It is a from-scratch matilda chocolate cake recipe that is completely achievable for a home baker with a little patience and a kitchen scale.
Related
Looking for other recipes like this? Try these:



Pairing
These are my favorite dishes to serve with Matilda Chocolate Cake:



📖 Recipe
Matilda Chocolate Cake Recipe
Ingredients
Equipment
Method
- First things first, let's get our oven ready at 350°F. I always grease my pans and line them with parchment, my grandmother always said a little extra care here saves a lot of heartbreak when the cake comes out!
- In a large bowl, whisk together your [all-purpose flour], [baking powder], [baking soda], [granulated sugar], [light brown sugar], and [salt]. Make sure there aren't any stubborn lumps of brown sugar hiding in there.
- In another bowl, let's mix the [eggs], [vegetable oil], [buttermilk], and [sour cream]. Using room-temp ingredients is my little secret, it helps everything emulsify into a silky dream.
- Gently add your dry mix into the wet ingredients. I like to fold them together with a spatula. Don't overwork it! We want a tender cake, not a tough one. Stop as soon as the flour streaks disappear.
- This is where the magic happens. Mix your [Dutch-processed cocoa powder] and [instant coffee] with the [boiling water]. It creates a dark, aromatic paste that makes this the best chocolate cake you've ever tasted.
- Pour that beautiful chocolate paste into your batter and fold it in. The color change is so satisfying, it turns into that deep, dark mahogany we're looking for.
- Divide the batter into your three pans. Bake for 22-24 minutes. Use the toothpick test, if it comes out with a few moist crumbs, it's perfect! If it's clean, it might be a bit dry, so keep a close eye on it.
- Let them cool in the pans for 20 minutes, then move to a wire rack. I highly recommend popping them in the fridge for an hour. Cold layers are much easier to frost without the cake crumbling everywhere!
- Gently melt your [dark chocolate] and [corn syrup] over a low flame. Once it's glossy and smooth, set it aside. It needs to be warm but not hot when we add it later.
- Beat the [cream cheese], [cocoa powder], and [powdered sugar] until smooth. Switch to your whisk attachment, add the [heavy cream], and whip until it's light and fluffy. It's so tempting to eat a spoonful right now, but stay strong!
- Slowly pour your melted chocolate into the whipped mixture while the mixer is on low. It will look a bit fluid at first, just let it rest for 30 minutes and it will thicken into the perfect spreadable fudge.
- Trim the tops of your cakes to make them flat. Stack them with a thick layer of frosting between each. I always do a "crumb coat" (a very thin layer of frosting all over) and chill it for 20 minutes before doing the final thick, rustic layer.
Nutrition
Notes
- Storage: This cake loves the fridge because of the cream cheese frosting. Keep it covered for up to 4 days.
- Serving Tip: For the best texture, take the cake out of the fridge 20-30 minutes before serving so the frosting softens slightly.
- Substitutions: You can swap sour cream for full-fat Greek yogurt if that's what you have in the fridge!
- Why Coffee? Don't worry, you won't taste it! The coffee just acts like a "volume knob" for the chocolate flavor.